
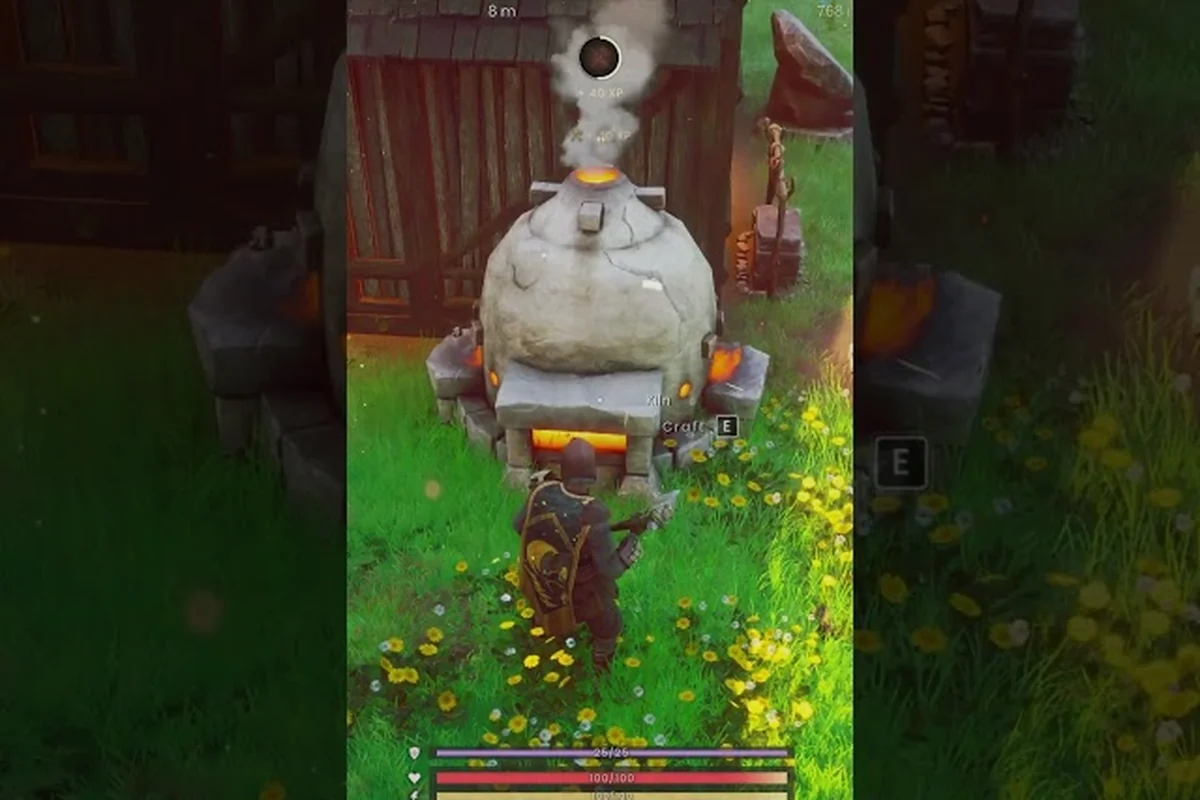
Hard leather is the backbone of mid-tier armor in RuneScape: Dragonwilds, and every aspiring crafter in Ashenfall hits the same wall the moment they open the tanning bench. You need soft animal fur, wool thread, fine cloth, and a stack of smelted bars before the recipe even shows up — and the 1.0 launch reorganized the whole bench system so guessing is no longer an option. This walkthrough breaks down every step of the RuneScape: Dragonwilds how to make hard leather pipeline, from chasing Garou pelts in Fellhollow to feeding adamant bars into the smithing forge, so you can stop farming and start crafting.
The Umbral Sands update rebuilt crafting around dedicated benches, which means the tanning station, weaving loom, and smithing forge each handle a clear piece of the supply chain. Knowing which bench does what — and which raw materials each one demands — saves hours of running back and forth across the wilderness. We pulled the bench layout, smelt order, and common bottleneck items from community testing and the official patch feed, and laid them out below in the order you'll actually craft them.
Hard Leather Recipe Requirements in RuneScape: Dragonwilds
Hard leather sits one tier above basic leather, and the recipe reflects that jump. The tanning bench consumes three prepared inputs and one smelted bar per finished piece, which is why new players keep walking away with empty queues. Here's the full input list and the bench that handles each step.
| Material | Quantity per Hard Leather | Source / Bench | Common Mistake |
|---|---|---|---|
| Soft Animal Fur | 2 | Dropped by Garou and Moon Garou in Fellhollow | Skinning with a bone knife instead of a steel skinning knife |
| Wool Thread | 1 | Spinning bench, made from 2 wool fibres | Skipping the spinning step and trying to weave raw wool |
| Fine Cloth | 1 | Weaving loom, made from 3 wool thread | Confusing fine cloth with rough cloth (lower tier) |
| Iron Bar | 1 | Smithing forge (2 iron ore + 1 coal) | Smelting without enough coal in the fuel slot |
Two of the three fibers come off animals, but the wool thread path goes through sheep shearing first, so plan your farm loops accordingly. Soft fur drops are not guaranteed — a Garou kill gives roughly a 40% chance per animal based on community testing, so plan for at least five kills per piece of leather. Fine cloth is the easiest bottleneck to overlook, because the weaving loom looks identical to the spinning bench and players queue the wrong recipe.
Where to Farm Soft Animal Fur
Soft animal fur only drops from mammalian predators in Fellhollow and the southern edge of Umbral Sands. Garou are the most common source, and they respawn quickly near the Fellhollow Lodestone at night, which makes them the safest farm for new crafters. Moon Garou appear during the Blood Moon event and drop a stack of three fur per kill, but they hit hard and summon packmates, so bring a backup weapon. Avoid the Zogre packs east of the lodge — they drop coarse fur, which only feeds the basic leather recipe and cannot be upgraded.
The Umbral Sands update also added a small Fur Trader NPC near the Dowdun Reach outpost who buys coarse fur at a 3:1 ratio for soft fur, which is a decent fallback if you're stuck waiting for a Garou respawn. According to the official RuneScape: Dragonwilds news feed, the trader rotates stock weekly, so check the board before committing your coarse fur stockpile to a conversion that may not be available tomorrow.
Spinning Wool Thread and Weaving Fine Cloth
The textile chain is the most common place new crafters stall, because Dragonwilds splits yarn production across two benches with non-overlapping recipes. You cannot substitute a woven item for a spun one, and the recipes do not auto-resolve when you queue the wrong material. Here is the full chain from raw wool to fine cloth.
| Step | Bench | Inputs | Output | Crafting Time |
|---|---|---|---|---|
| Shear sheep | Hand tool | 1 sheep | 1 Wool Fibre | Instant |
| Spin thread | Spinning Bench | 2 Wool Fibre | 1 Wool Thread | 4 seconds |
| Weave cloth | Weaving Loom | 3 Wool Thread | 1 Fine Cloth | 8 seconds |
| Weave rough cloth | Weaving Loom | 2 Wool Thread | 1 Rough Cloth | 6 seconds |
Wool thread is the spinning bench product, while fine cloth is the weaving loom product, and the two benches are often placed on opposite sides of a crafting hub, so build them close together. Wool fibre is the universal input and stacks to 200, so a single sheep farm with four adult ewes produces roughly 12 fibre per day based on community testing. The weaving loom also outputs rough cloth at a 2:1 thread ratio, which is a common trap because rough cloth looks identical to fine cloth in the inventory and is useless for hard leather.
Setting Up a Wool Farm
The fastest wool farm uses four ewes penned inside a small fenced area near your main crafting hub, because ewes respawn wool every 24 in-game hours regardless of feeding. Place a hay trough inside the pen and the respawn timer drops to 16 hours, which roughly doubles your daily output. Sheep are passive and never despawn, so a corner of your home base works better than chasing wild sheep across the open world. The Fellhollow Lodestone is the closest fast-travel point to wild sheep, and a round trip from the pen to the spinning bench takes about 20 seconds once you lay down a small stone path.
Smelting Iron, Gold, and Adamant Bars at the Smithing Forge
Bars are the metal backbone of the hard leather recipe, and the smithing forge handles every tier from bronze through adamant. The Umbral Sands update made coal a required fuel for iron and above, which caught returning players off guard because the old system used wood charcoal. Here is the smelt cost and bench time for each bar tier relevant to leather crafting and its upgrades.
| Bar Type | Ore Required | Fuel Required | Smelt Time | Primary Use |
|---|---|---|---|---|
| Iron Bar | 2 Iron Ore | 1 Coal | 6 seconds | Hard leather recipe, basic melee gear |
| Gold Bar | 2 Gold Ore | 1 Coal | 6 seconds | Jewelry, payment items, fine leather trim |
| Adamant Bar | 3 Adamantite Ore + 1 Coal | 2 Coal | 10 seconds | High-tier melee, reinforced leather armor |
| Runite Bar | 3 Runite Ore | 3 Coal | 14 seconds | End-game smithing, optional upgrade path |
Each forge queue consumes ore and fuel at a 1:1 ratio, so a full coal stockpile is the real gating resource. Iron ore is the most common and clusters around the Ashenfall iron veins north of the starting lodge, while gold ore appears in small pockets near the Dowdun Reach riverbed. Adamantite is rarer and only spawns in the Scorched Caverns sub-region of Umbral Sands, so plan a dedicated mining trip instead of a quick detour.
How to Smelt Iron Bar Efficiently
RuneScape: Dragonwilds how to smelt iron bar is the first real smelt question every new player hits, because iron is the recipe floor for hard leather and most melee gear. The forge takes 2 iron ore and 1 coal per bar, and you can queue up to 20 bars in a single batch if the fuel slot stays full. Coal spawns in the same iron node about 30% of the time, so a long mining run almost always returns enough coal to smelt the ore you just picked up. If your coal stock is low, the Dwarven Mine fast-travel point south of the Scorched Caverns has a reliable coal vein that respawns every 8 in-game hours.
Place the forge within two tiles of your ore stockpile, because carrying 200 iron back from a distant vein eats more time than the smelt itself. According to the Primitive Nomad gear tips video, the smithing forge and anvil now share a single fuel pool, so you can smelt a stack of bars and immediately hammer them into plate without refilling. The same fuel pool feeds a connected anvil, which keeps your crafting hub compact and avoids the inventory shuffle that plagued pre-1.0 crafting.
RuneScape: Dragonwilds Gold Bar and Adamant Bar Sources
Gold bar production follows the same forge rules as iron but the ore is rarer, and most gold veins sit inside Zogre-infested caves along the Umbral Sands border. Bring a backup weapon and clear the cave first, because Zogres summon adds mid-fight and a swarm will cut your mining run short. The gold bar is mostly used for trim pieces and jewelry rather than armor plating, so a small stockpile of 10-15 bars is enough for most players.
Adamant bars are the high-tier smelt, and the recipe demands 3 adamantite ore and 2 coal per bar with a longer 10-second craft time. Adamantite veins are larger than iron or gold but spawn in a tight cluster inside the Scorched Caverns, and the cave is a mini-raid zone with two named enemies. Clear the room, mine the cluster, and smelt on-site to avoid carrying heavy ore through hostile territory. If you need runite for a follow-up craft, the runescape dragonwilds runite bar guide covers the higher-tier smelt and the dedicated coal stockpile it requires.
Building the Crafting Hub Layout
Bench placement matters more than it looks, because the Umbral Sands update added a fuel-sharing radius between adjacent crafting stations. A well-laid hub cuts your per-piece craft time by almost a third, while a sprawling layout eats that time back in walking. Here is the bench order that flows the cleanest for a leather-focused crafter.
| Bench Position | Bench Type | Feeds Into | Tile Distance |
|---|---|---|---|
| North wall | Tanning Bench | Output bench | — |
| North-east corner | Spinning Bench | Weaving Loom | 2 tiles |
| East wall | Weaving Loom | Tanning Bench | 3 tiles |
| South wall | Smithing Forge | Anvil | 1 tile |
| South-east corner | Anvil | Storage chest | 2 tiles |
The tanning bench sits at the top because it is your final station, and putting the spinning bench and weaving loom close together lets you walk the wool thread straight to the loom without crossing the hub. The smithing forge and anvil share a fuel pool, so keep them touching each other along the south wall and let the coal stockpile sit one tile away. The exact hub design from the runescape dragonwilds smithing anvil guide is a good starting template, because it covers the shared fuel pool in more detail and shows how to wire an anvil into a tanning bench for reinforced leather work later.
Common Hub Mistakes to Avoid
The most common mistake is placing the weaving loom across the hub from the spinning bench, because the wool thread in transit counts against your carry weight and you will often log out mid-craft. The second mistake is putting the tanning bench inside the storage ring, because the queue UI overlaps the chest panel and players accidentally withdraw the wrong material. Keep the tanning bench on an outside wall with the queue facing the open floor, and reserve the inside ring for chests and a small rune altar if you also craft mage gear. The runescape dragonwilds how to get rune essence guide is a useful companion if you plan to mix leather armor with rune-infused gear, because it covers the anima bark pipeline that feeds the rune altar.
Hard Leather Crafting Workflow Step by Step
Once your hub is laid out and your raw materials are stocked, the actual craft is a tight 4-step loop. The key is to keep every input stack topped off before you start a batch, because a stalled queue costs more in idle time than the materials themselves.
| Step | Action | Time | Material Cost |
|---|---|---|---|
| 1 | Skin 10 Garou in Fellhollow | 4-5 minutes | 10+ coarse fur, target 20 soft fur |
| 2 | Shear sheep and spin wool | 2 minutes | 6 wool fibre → 3 wool thread |
| 3 | Weave 1 fine cloth at the loom | 8 seconds | 3 wool thread |
| 4 | Smelt 1 iron bar at the forge | 6 seconds | 2 iron ore + 1 coal |
| 5 | Queue hard leather at the tanning bench | 12 seconds | 2 soft fur + 1 wool thread + 1 fine cloth + 1 iron bar |
One hard leather piece takes about 5 minutes of prep if you count travel and skinning, but the actual queue time at the bench is only 12 seconds. The prep is the bottleneck, not the craft, so the best way to scale up is to batch your raw material runs. A typical leather session yields 5-6 hard leather pieces per Fellhollow loop, which is enough to craft a full chest piece plus bracers in one sitting.
Power-Leveling Hard Leather
If you need a large batch fast, run Fellhollow during the Blood Moon event, because Moon Garou drop triple fur and the event boosts drop rates across the region by about 20% based on community testing. Bring a steel skinning knife and a backup ranged weapon, because the pack will swarm you if you aggro more than two at once. The other fast path is to convert coarse fur at the Dowdun Reach trader during a fur-stock reset, which gives you 1 soft fur per 3 coarse fur and skips the Garou farm entirely. The trader is a 3:1 rate, so it is most useful when you already have a coarse fur stockpile from earlier leather runs and want to upgrade without grinding.
Using Hard Leather in Mid-Tier Gear
Hard leather is the unlock condition for a whole armor family, and most players craft it as a stepping stone toward reinforced leather. The recipe is the same across all hard leather outputs, so once you have the inputs, you can pick which piece to queue first. Here is what each hard leather output does and the stat profile it gives.
| Output | Slot | Defense Bonus | Special Effect | Recommended For |
|---|---|---|---|---|
| Hard Leather Chest | Chest | +18 | +5% Anima Regen | Mage-hybrid builds |
| Hard Leather Bracers | Arms | +9 | +3% Attack Speed | Melee skirmishers |
| Hard Leather Chaps | Legs | +12 | +4% Stamina Regen | Exploration builds |
| Hard Leather Cowl | Head | +7 | +2% Critical Hit | Rogues and rangers |
The chest piece is the most popular first craft, because the +5% Anima Regen effect stacks with the rune altar and lets casters chain spells without long pauses. The bracers are the best early-game pick for melee players, because +3% attack speed compounds across a long fight and noticeably speeds down basic combos. If you mostly explore the open world, the chaps' stamina regen is the best travel perk, and the cowl is a niche pick for crit-focused rogues who want to skip the heavier adamant chest option.
When to Upgrade to Reinforced Leather
Hard leather is a mid-tier stop, and reinforced leather is the next upgrade. The reinforced recipe swaps the iron bar for an adamant bar and adds a small rune essence cost, which is why most players wait until they have a stable adamant supply. According to the DaDrunkenClam early-game potions video, the transition from hard to reinforced leather usually happens around the 30-hour mark, when adamantite veins in the Scorched Caverns become solo-able. If you are still building your first hard leather set, do not worry about reinforced yet — the hard leather chest alone will carry you through the early Dowdun Reach vault.
Frequently Asked Questions
What is the fastest way to make hard leather in RuneScape: Dragonwilds?
Farm Moon Garou during the Blood Moon event for triple soft fur drops, then run wool through your spinning bench and weaving loom in parallel. Smelt iron bars during the Blood Moon downtime and queue the tanning bench last. A full prep loop takes about 5 minutes per piece, and a Blood Moon run yields enough fur for 6-8 hard leather pieces in one session.
Do I need an adamant bar for the basic hard leather recipe?
No, the standard hard leather recipe only requires an iron bar, and that is the only bar tier new players need. Adamant bars only enter the picture when you upgrade to reinforced leather, which is a separate recipe with higher stats and a small rune essence cost. Stick with iron until your adamantite farm is stable.
Can I substitute fine cloth for rough cloth in the hard leather recipe?
No, the tanning bench will not accept rough cloth as a substitute, and the queue returns an error if you try. Rough cloth is reserved for low-tier leather patches and decorative banners, while fine cloth is the only woven item that unlocks the hard leather path. Always double-check the woven item in your inventory before queuing.
Where is the best place to farm soft animal fur for the RuneScape: Dragonwilds hard leather recipe?
Fellhollow around the lodestone is the safest farm because Garou respawn quickly and the area has no environmental hazards. Moon Garou during a Blood Moon drop more fur per kill but hit harder and summon packmates, so bring a backup weapon. The Dowdun Reach fur trader is a solid 3:1 fallback if you already have a coarse fur stockpile from earlier runs.
How many hard leather pieces do I need for a full armor set?
You need four pieces — chest, bracers, chaps, and cowl — and each piece consumes 2 soft fur, 1 wool thread, 1 fine cloth, and 1 iron bar. Plan for at least 8 soft fur, 4 wool thread, 4 fine cloth, and 4 iron bars to craft the full set, plus a small buffer in case a queue fails or you want to swap a piece later. A single Fellhollow loop with a Moon Garou detour usually covers the full set in one session.