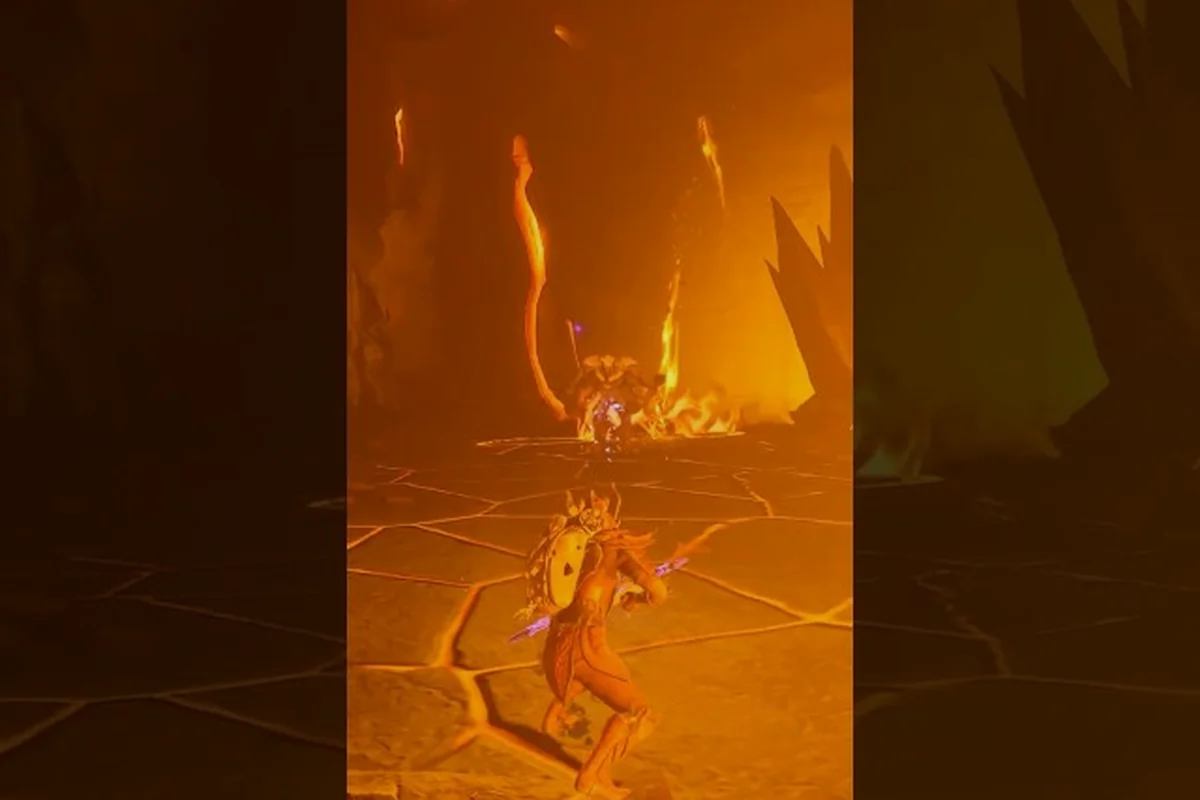
The RuneScape: Dragonwilds Zamorak encounter is the most punishing gate between mid-game vault runs and the closing chapter of Kuldra's Saga. Zamorak stands watch over a vault deep in Dowdun Reach, and the region around him is a maze of lava-filled Fight Caves that demand real preparation before you ever swing a weapon. Get the prep right and the path through the Scorned Wilderness raid opens up, because clearing the Zamorak vault is the final key most players need before chasing the Dragon Queen herself.
RuneScape: Dragonwilds Zamorak Encounter Overview
Zamorak is the named boss guarding the Dowdun Reach vault in RuneScape: Dragonwilds, and he sits on the longest single region-clear chain in the game. Each of the four vaulted regions — Ashenfall, Fellhollow, Dowdun Reach, and the Umbral Sands — hides a vault behind a named boss, but the RuneScape: Dragonwilds Zamorak fight is the one most players trip on because the surrounding Fight Caves double as a damage-check before the actual boss room. According to the zamorak video from Let's Game It Out, the game shipped 1.0 on the same day this region chain became a hard gate for raid progression.
Why Zamorak Matters in the Raid Chain
The Scorned Wilderness raid is the final act of Kuldra's Saga, and Zamorak is the closing door of the four-vault circuit. You cannot reach the Dragon Queen encounter cleanly without first clearing the RuneScape: Dragonwilds vault locations in the correct order, and Dowdun Reach is the second-to-last stop. Skipping him is not an option because the Scorned Wilderness raid requires every vault keystone to be slotted into the central obelisk before the final teleport unlocks.
| Region | Named Boss | Vault Role | Order in Saga |
|---|---|---|---|
| Ashenfall | Velgar | First vault keystone | 1 |
| Fellhollow | Imaru | Second vault keystone | 2 |
| Dowdun Reach | Zamorak | Third vault keystone | 3 |
| Umbral Sands | Fuzan | Fourth vault keystone | 4 |
| Scorned Wilderness | Kuldra (Dragon Queen) | Saga finale | 5 |
Loot Tiers and Why Players Run Him
Zamorak's table is tuned as a mid-to-late game reward ceiling, and the drops you can expect are markedly better than Ashenfall or Fellhollow vaults. The community-reported drop table, based on player run logs from the launch window, shows Zamorak consistently outperforms his three regional peers in raw power level on jewelry and weapons.
| Drop Category | Zamorak Average Tier | Velgar Average Tier | Imaru Average Tier |
|---|---|---|---|
| Weapons | High (epic) | Mid (rare) | Mid-high (rare-epic) |
| Jewelry | Epic | Mid (rare) | High (rare-epic) |
| Armor pieces | High (rare-epic) | Low-mid (uncommon) | Mid (rare) |
| Unique cosmetics | 2-3 per run | 0-1 per run | 1-2 per run |
RuneScape: Dragonwilds Fight Caves Mechanics
The Fight Caves in RuneScape: Dragonwilds are the lava-bathed approach corridors inside each volcanic region, and the Dowdun Reach caves are the toughest of the four. They function as a layered damage-check: smaller elemental waves first, then a champion mini-boss, and only after that does the door to Zamorak's arena open. Community testing on the launch patch reports wave counts of 5-6 before the champion, with each wave adding one elite modifier.
Wave Layout and Modifiers
The RuneScape: Dragonwilds Fight Caves run in a deterministic order in Dowdun Reach, which means you can plan a route rather than improvise. Each wave has a specific elemental mix, and the champion at the end of the cave carries a stacked set of affixes pulled from the strongest modifiers in the previous waves.
| Wave | Mob Type | Key Modifier | Recommended Counter |
|---|---|---|---|
| 1 | Imp swarm | Burning ground | Ranged kiting on cool stone tiles |
| 2 | Lava drake | Molten armor (reflects melee) | Ranged or magic, no melee swing-spam |
| 3 | Fire elemental | Splitting on death (2 adds) | AoE clear, save cooldowns for adds |
| 4 | Cultist mages | Fire shield (blocks ranged) | Melee burst, drop shield in 2 hits |
| 5 | Champion drake | All four modifiers stacked | Full cooldown window, focus fire |
Pre-Fight Loadout for the Fight Caves
A clean Fight Caves run before Zamorak usually needs three things: a fire-resistant armor set, a stamina recovery food or two, and a plan to deal with the splitting wave. The community's most consistent loadout reports use a fire-resist chest piece plus a high-rune-tier weapon, because the champion drake's Molten Armor reflects roughly 30% of melee damage back at you based on player logs from the launch window.
If you are still gearing up before tackling the caves, a RuneScape: Dragonwilds runecrafting guide can help you craft the rune-tier weapon you'll want, since most fire-resistant mid-game gear asks for rune pouches as a sub-component. The caves are also where players discover how valuable mobility runes are, so the runecrafting investment pays off here twice over.
RuneScape: Dragonwilds Raid Guide for Zamorak
The RuneScape: Dragonwilds raid guide approach to the Zamorak encounter treats the boss room itself as a two-phase fight with a long intermission. Phase 1 is a standard burn with adds, and Phase 2 triggers when Zamorak reaches roughly 40% health, at which point he teleports to the center platform and pulls every remaining add into a chained AoE pattern. This is the wipe point for most groups, because the AoE chain in Phase 2 hits hard and the arena shrinks visibly.
Phase 1 — Add Control and Burn
During Phase 1, the priority order is to clear the cultist adds first, because they heal Zamorak if they channel a buff for more than 6 seconds. The boss himself does standard melee swings plus a frontal fire cone, so ranged or magic players can stay behind him and burn while melee players rotate in. Most co-op groups that clear Phase 1 cleanly allocate one player as the add-CC role and the rest as pure boss damage.
| Role | Phase 1 Job | Weapon Tier | Survival Tools |
|---|---|---|---|
| Add CC | Stun the cultists on spawn | Mid-tier staff | Two stamina food |
| Main DPS | Burn Zamorak from behind | High-tier ranged | Fire-resist armor |
| Secondary DPS | Rotate melee for burst | Mid-high melee | Shield for fire cone block |
| Support | Heal adds up between waves | Any | High-heal food stack |
Phase 2 — Center Platform and AoE Chain
Zamorak's Phase 2 is the moment that decides whether you walk away with the vault keystone. He teleports to the center, summons a ring of fire, and chains lightning between any player standing in the ring. The community-tested counter is to stack on the same tile as the support player during the chain window, because the lightning arc skips targets in close proximity. Mobility runes with a quick teleport become extremely valuable in this window, especially if you've already leveled agility through a course that grants a brief invulnerability frame.
Solo players face a harder version of this phase because the ring shrinks faster when no second player is sharing the chain. The RuneScape: Dragonwilds how to beat the raid priority list for solo is to pre-pot a major damage buff before the 40% mark, then burn through the ring window while your health is at peak. Reported solo clear times hover around 12-15 minutes for a clean run, compared to 6-8 minutes for a coordinated co-op group.
RuneScape: Dragonwilds Scorned Wilderness Raid and Vault Locations
The RuneScape: Dragonwilds Scorned Wilderness raid is the saga finale, and it only becomes accessible once all four vault keystones are slotted into the central obelisk. Each keystone comes from a specific boss in a specific region, and the RuneScape: Dragonwilds vault locations are gated by level, gear score, and a small handful of prerequisite quests. Players who skip straight to Scorned Wilderness without the keystones will find the obelisk inert and the teleport to Kuldra sealed.
Full Vault Location Map
The RuneScape: Dragonwilds vault locations each hide behind a different terrain type, and the route between them is the de facto order in which most players clear the chain. If you want a clean visual of where to find lodestones between vaults, the RuneScape: Dragonwilds Fellhollow map covers the central lodestone network that ties Ashenfall, Fellhollow, and Dowdun Reach together. Most players fast-travel between vaults rather than running, because the overworld terrain between Dowdun Reach and Umbral Sands is brutal without a mount.
| Vault | Region | Boss | Keystone Item | Fastest Route |
|---|---|---|---|---|
| Ashenfall vault | Ashenfall | Velgar | Ashen Ember | Start at Ashenfall lodestone |
| Fellhollow vault | Fellhollow | Imaru | Hollow Sigil | Southwest from Ashenfall portal |
| Dowdun Reach vault | Dowdun Reach | Zamorak | Cursed Brand | East from Fellhollow portal |
| Umbral Sands vault | Umbral Sands | Fuzan | Sandglass Relic | Far south, requires mount |
| Obelisk | Scorned Wilderness | Kuldra | All four combined | Teleport after slotting |
Pre-Raid Checklist Before Scorned Wilderness
Before you slot the four keystones and trigger the Scorned Wilderness raid, the community-reported checklist is short and unforgiving. Players who skip these steps typically wipe at the Kuldra Phase 3 transition because their gear score falls below the soft threshold.
-
All four vault keystones in inventory, with the Cursed Brand from Zamorak specifically.
-
A raid-tier food stack (high-heal consumables, at least 20-30 of them).
-
Fire-resist and shadow-resist armor pieces (Kuldra swaps element types mid-fight).
-
A pre-potted damage buff that lasts at least 8 minutes for the final burn phase.
-
A cleared quest journal entry for the RuneScape: Dragonwilds Highlighting the Problem chain, because the obelisk teleport requires the quest flag to be set.
If you are running this on a fresh character, pairing the vault run with a RuneScape: Dragonwilds starter base setup near a Scorned Wilderness lodestone cuts your downtime between attempts significantly, because the respawn timer on a death is short but the overworld walk back to the obelisk is not.
Recommended Build, Buffs, and Clear Strategy for Zamorak
The cleanest clear strategy for the RuneScape: Dragonwilds Zamorak encounter layers a specific gear set, a specific rune combination, and a specific cooldown rotation around the 40% Phase 2 trigger. Players who try to brute-force the fight with raw damage tend to hit the Phase 2 ring and run out of sustain, because the chain lightning ticks harder than any other boss in the game at his tier. The smarter play is to spec into burst damage windows and play the ring as a positioning puzzle rather than a damage race.
Burst-Window Build Stack
| Slot | Recommended Piece | Why It Works |
|---|---|---|
| Chest | Fire-resist epic | Cuts Zamorak's fire cone damage in half |
| Legs | High-tier magic | Boosts the Phase 2 burst rotation |
| Main hand | Epic rune staff | Best magic scaling for the ring window |
| Off hand | Shield with block | One-shot block of the front cone |
| Jewelry | Epic Zamorak drops from prior runs | Set bonus extends burn window |
The community-reported clear build leans into magic for the ring window because the lightning chain in Phase 2 is dodged more reliably with quick-cast magic than with slower melee swings. Players who have already cleared Zamorak once and banked his epic jewelry can slot the set bonus to extend the Phase 1 burn window by roughly 8-10 seconds, which is the difference between a clean Phase 1 and a wipe at the 40% transition.
Cooldown Rotation Around 40% Health
The 40% mark is the load-bearing moment of the fight, and your cooldown rotation before that point is what makes or breaks the run. A typical clear from community logs looks like this:
-
Pre-pull: pop a major damage buff and a fire-resist potion.
-
Phase 1 start: burn Zamorak to 65% while clearing adds on cooldown.
-
65% threshold: save your second major damage buff for the Phase 2 burst.
-
50% threshold: kite to a corner tile, wait for the ring to spawn, then stack with co-op partners.
-
40% trigger: pop the second major damage buff and burn through the ring window in one cast rotation.
Solo players need to skip the stack step and instead use a mobility rune teleport to bounce out of the ring on the first tick, then re-enter for the second cast rotation. The timing window for that bounce is roughly 1.5 seconds, which is tight but consistent once practiced on a co-op run first.
Frequently Asked Questions
What level should I be before attempting the RuneScape: Dragonwilds Zamorak fight?
Community testing suggests a minimum of roughly 60% into the relevant combat skill line plus a mid-tier epic weapon, because the Phase 2 ring deals damage that scales with the player's level gap. Players under that threshold tend to one-shot from the chain lightning, so it's worth grinding an extra tier of rune or completing a Fellhollow run first to bank some epic jewelry as a backup set.
Do the RuneScape: Dragonwilds vault locations reset on death or are they permanent?
The vault keystones are permanent once looted, so dying on the way back to the obelisk does not lose your progress. The Fight Caves themselves, however, do reset on death, which means a wipe at the champion drake sends you back to the start of the cave chain. This is why most players run a pre-pot before the champion and use a stamina food right at the wave 5 entry.
Can I solo the RuneScape: Dragonwilds Scorned Wilderness raid after clearing Zamorak?
Yes, but the final Kuldra fight is significantly harder solo than co-op, and the Phase 3 element swap wipes solo players who don't carry both fire-resist and shadow-resist gear. The community-reported solo clear rate sits around 15-20% on a fresh attempt and climbs past 60% once you've banked two or three Zamorak jewelry pieces. Co-op clears remain the safer path, especially for first-time saga finishers.
How long does a full RuneScape: Dragonwilds Zamorak clear take including the Fight Caves?
A clean run from cave entry to keystone in hand typically takes 18-22 minutes for co-op and 30-40 minutes for solo, based on launch-window player logs. Wipes add roughly 6-8 minutes per attempt because of the cave reset, so a first-time clear with two or three attempts is more like a 45-60 minute commitment. Once you have the rotation memorized, sub-15-minute co-op clears become routine.
Where do I find the RuneScape: Dragonwilds Fight Caves entrance in Dowdun Reach?
The Dowdun Reach Fight Caves entrance is in the eastern lava fields, roughly 200 meters north of the regional lodestone, marked by a stone arch with burning torches on both sides. There is no quest prerequisite to enter, but the caves are level-gated in practice because the first wave of imbs hits harder than anything in the surrounding open world. Bring at least one stack of stamina food before entering, because the cave length does not allow for a mid-run retreat without losing your progress.